Sonokinetic – Ostinato Brass
You Must Purchase Kontakt Pro From Us To Install & Use This Library In Full Version Click Here
- Full Version
- Library Size 10GB
- Instant Download
- Lifetime Activation & Access To Download
£22.00
DEMOS
About Ostinato Brass
The phrase library for complex brass chords
Last year we released our Ostinato Strings library. It was designed to solve one specific issue that virtual instruments have struggled with for years: how to create realistic ostinato motifs without sacrificing playability. The library took our phrase-based approach and extended the harmonic scope so that far more complex chords than simple major and minors could be played.
Ostinato Strings was met with great acclaim both for the sound and the flexibility of the chord system, so we couldn’t resist following it up with a brass section using the Ostinato engine and with the same intuitive features. We returned to the great recording space we employed for other Sonokinetic orchestral libraries and gathered a selection of some of the greatest (and most precise) brass players to perform for us.
The entire approach is different from our regular phrase instruments in that we recorded separate intervals for various rhythm building blocks. After careful editing we combine these intervals through an intelligent script that builds them into chords in 5 different voicings and up to 4 inversions (the fourth only for 7th chords).
Not only does the engine build the chords based on the inversion you play in the chord area, but when you play in the harmonic shift area it will judge which inversion it plays based on the chord that came before it, the chord quality on the key you’re in and the position of the chord you’re triggering in that key. This ensures that transitions are smooth and harmonically correct.
Ostinato Brass recognises and plays 12 different chord types, handling not only major and minor chords but also diminished, half-diminished, augmented chords and many more. For a full list check the user manual.
This library coexists alongside both our Orchestral Series and our Phrase-Based libraries, being recorded in the same hall, with identical mic positions and even utilising some of the same players. Our orchestral libraries blend seamlessly together.
We, at Sonokinetic BV, are very proud to introduce Ostinato Brass to you and can’t wait to hear the amazing things you, our valued customer base, will produce with it.
Sonokinetic has established a name as one of the best value & quality sample producers and with this product we’d like to underline that statement. We stick with our unbeatable pricing module and high quality sampling.
Technical Overview
The Interface
Below is the main interface for Ostinato Brass. Almost every aspect of the instrument can be changed either by clicking on the appropriate part of the interface, or by using the colored keyswitches. Pressing some of these keyswitches will have different effects depending on what velocity you use. More on that later.
Preset Patterns
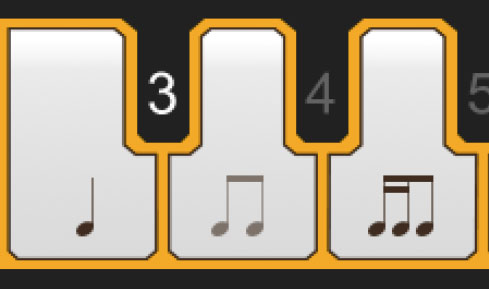
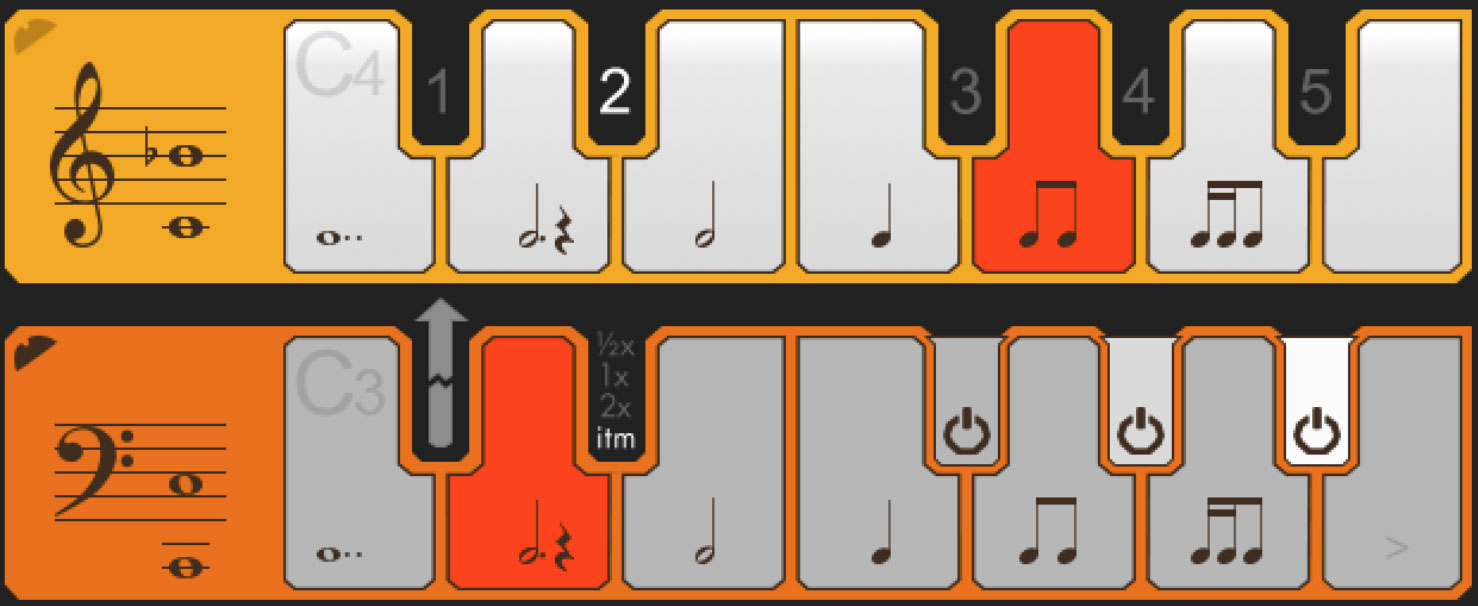
Ostinato Brass is an instrument for playing rhythmic brass motifs. In total there are 6 different types of patterns, indicated by these graphics in the interface – shown on the white keys.
High and low Brass can be assigned different patterns (more on that below). Choose patterns either by clicking the relevant white key in the interface, or with the yellow keyswitches shown below. These are white keys C3-A3 (low Brass) and white keys C4-A4 (high Brass)
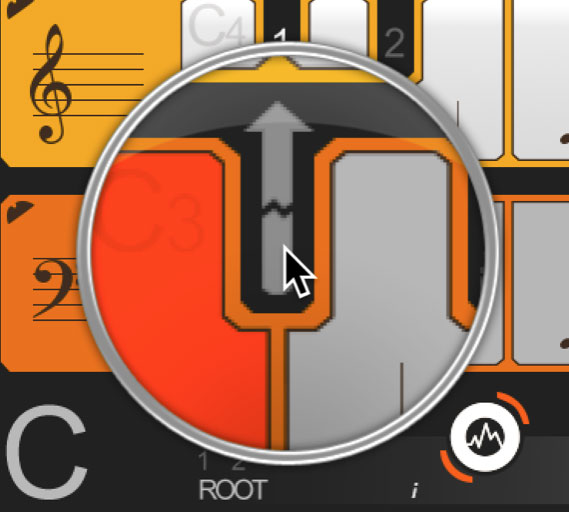
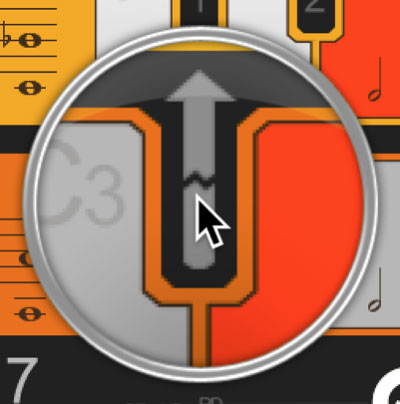
By default the high and low brass patterns are linked, so that if you change the pattern in either high or low, the other brass section will change accordingly. These sections can be unlinked by clicking this arrow graphic in the interface or using the velocity sensitive keyswitch at C#3. More information about this coming up.
Muting
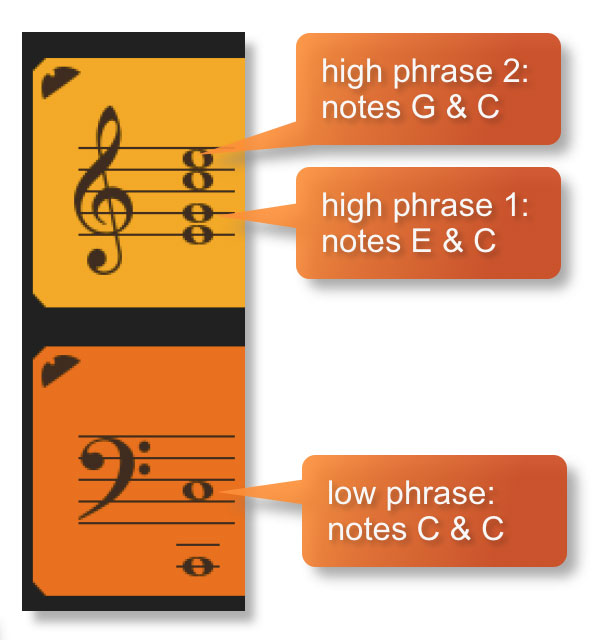
Every time you play a chord in Ostinato Brass you are actually hearing 3 sampled phrases playing together. These comprise of two high note phrases (each of one or two notes) and one low phrase (of two notes an octave apart). The easiest way to see this in action is by looking at the notation shown on the left hand side of the interface.
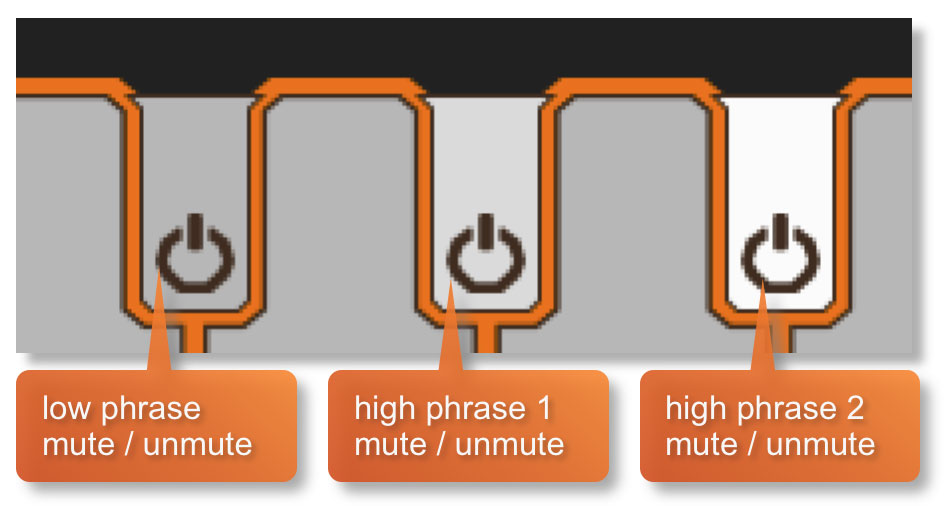
Shown to the right is one of the variations of a C major chord. It is possible to mute and unmute these 3 phrases by using the interface mute buttons (shown below) or the keyswitches at F#3, G#3 and A#3.
It’s also possible to adjust the panning and volume level of the 3 phrases by using the controls shown here. These can be found in the options menu and will be covered later in the manual.
Mod Wheel
By default the MOD wheel of your MIDI keyboard will control the output volume of both the high and low brass patterns. As you lower the volume using the MOD wheel, subtle EQ adjustments are also introduced to soften the sound and give the impression of a great dynamic range.
It is possible to deactivate the MOD wheel control of either the high or low layers (or both) by clicking the MOD wheel icon. It will then turn grey to indicate that it is deactivated. Click again to activate.
You can use this function to add versatility to the layers, by fading one layer against another. You can also activate and deactivate this control using the keyswitches at C#6 and D#6. Press with high velocity to activate and low velocity to deactivate.
Speed Control
Phrases in Ostinato Brass have been recorded at 130 BPM in 4/4 time. Regardless of the time signature and speed of your composition, the Ostinato engine will adjust the timing and playback of the phrases automatically so that they fit your project.
Click the buttons shown below to change the playback speed of the phrase, relative to your DAW’s BPM. The phrases will always sync to your host DAW tempo, being time-stretched within Kontakt to match the BPM. You can also use the keyswitch at D#3 to switch between playback speeds, with the 4 different speeds being assigned to 4 different velocity levels of that key. For example, press D#3 at high velocity to switch to ITM and at lowest velocity for half speed.
Playback at ½ speed, relative to DAW BPM
Original recorded speed, relative to DAW BPM
Playback at 2 x speed, relative to DAW BPM
Automatic – “Intelligent Tempo Mapping” – Playback at recorded speed, but at automatic half / double time at extreme tempi. This is generally the best speed setting. However, if your project has a tempo change mid-phrase, you may find that an alternative speed setting may be more useful. Also, when you are doing gradual tempo changes across a large range, it might be a good idea to opt for one of the fixed values instead of ITM.
Purging
It’s easy to purge patterns that you’re not using. Just click on the notes shown on the white keys in the interface. They will turn grey in color and the sample will be purged from memory. To reload, simply click the note again.
Link / Unlink Bass Layer
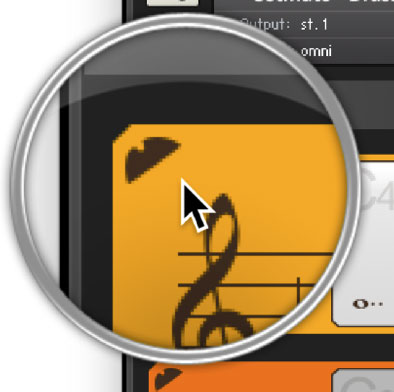
To get the maximum flexibility out of Ostinato Brass we’ve provided the ability to unlink the bass Brass layer from the two high Brass layers. This means that you can assign independent patterns to each. To unlink the bass layer simply click on the arrow shown here, or use the velocity sensitive keyswitch at C#3.
This will then allow you to choose different patterns for each of the two layers. An example of this is shown below:
Bass Invert
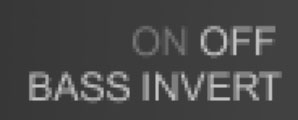
Although Ostinato Brass plays the inversion it gets from chord detection, the bass layer will, by default, play root notes of the chord rather than the lowest note of the inversion. If you want the bass layer to play inversion notes you can turn Bass Invert on. In that case the bass layer will play E in the first inversion of C, Bb in the 3rd inversion of C7, etc. In some voicings the bass layer may have some tonal material other than just the octave, for instance C-E or C-G for a C chord. When Bass Invert is on it will always play an octave to avoid adding notes that don’t belong.
Accent Key
Because of the flexible nature of the product, all the material is recorded ‘flat’. To add a more natural feeling we added the Accent Key on B3. Play this key staccato while your phrase is playing to put a slight emphasis on some notes.
Options
Click the Sonokinetic icon at the bottom of the interface to open the options menu. From here you can control volume, panning, microphone positions, global tuning and Harmonic Shift.
Volume & Panning
Click the VOLUME / PAN legend at the bottom left of the options interface to display these controls.
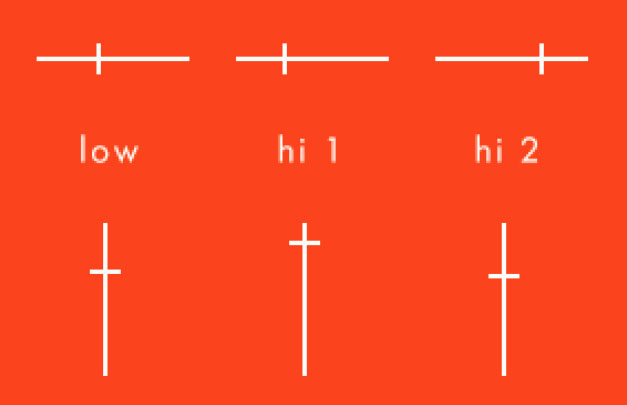
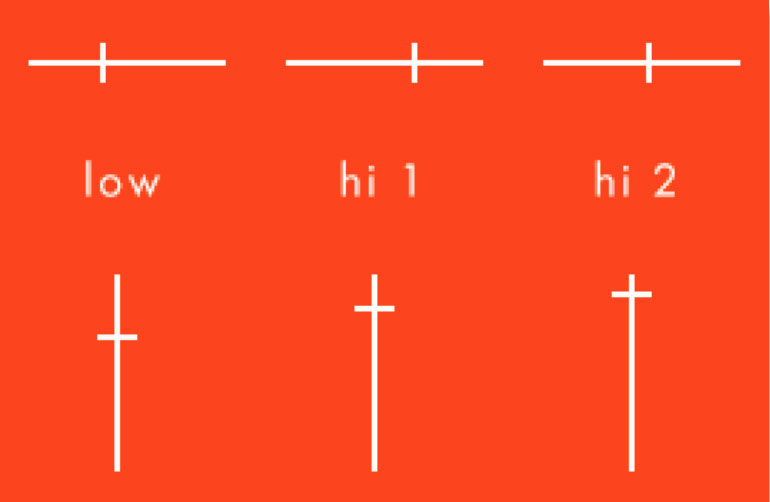
In each field, drag the white overlay lines to adjust the volume and panning for the 3 phrase layers. Ctrl / Cmd + click to reset these to default.
Tuning
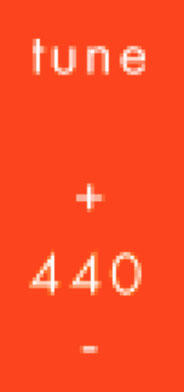
It’s easy to change the global pitch within Ostinato Brass. Just click the +/- controls shown here. Choose from either standard pitch (440Hz) or an alternative concert pitch (436 – 444Hz). Some live orchestras may be tuned to these alternative pitches so this function makes it easy to match the samples in Ostinato Brass to live recordings.
Microphone Mixing
Click the MIC POSITIONS legend at the bottom of the options interface to display the microphone mixing controls.
The samples for Ostinato Brass have been recorded in the same hall as sister libraries , Expressivo, Maximo, Sotto, Capriccio, Grosso, Minimal, Da Capo, Tutti, Maximo and Vivace. As such, Ostinato Brass has similar options for microphone mixing; Close, Decca Tree, Wide and Far (balcony). It is possible to use just one microphone position or mix between two different positions.
These different positions can be selected by clicking on the microphone position name.
Mixing is controlled by dragging the white slider line. The crossfade operates in such a way that the central position will play both microphone positions at full volume.
Microphone mixing options are global and apply to the entire instance of Ostinato Brass. Note that activating multiple microphone sections puts additional strain on CPU usage.
If you plan on using just one microphone position, set the other position to NONE to conserve CPU and RAM.
Ostinato Brass Lite
We have included ‘Lite’ versions of all Ostinato Brass instrument patches. These patches function in exactly the same way as the full versions but do not have microphone-mixing options. Instead, the samples have been pre-mixed from the four recorded positions. Use these patches when you only need just one pre-mixed version of Ostinato Brass, which will conserve RAM and CPU.
Harmonic Shift
If you’re familiar with previous phrase-based libraries from Sonokinetic then you may have used the harmonic shift function before. Be aware that in Ostinato Brass the harmonic shift operates differently than before. In Ostinato Brass it’s more like a ‘one-key’ automatic voice leading tool. We will look more closely at how to play with harmonic shift later in this manual.
Access the Harmonic Shift window by clicking HARMONIC SHIFT in the options menu. This gives you the option to change the type of chord that is triggered when you play different combinations of chord types and press different harmonic shift keys from C5 to B5.
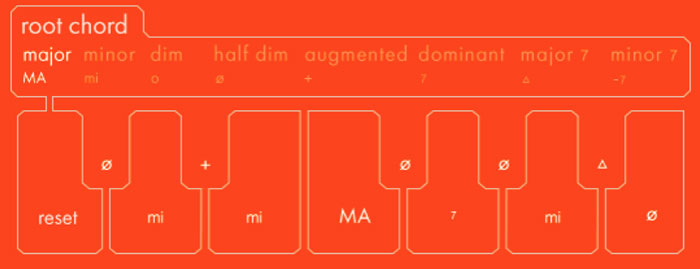
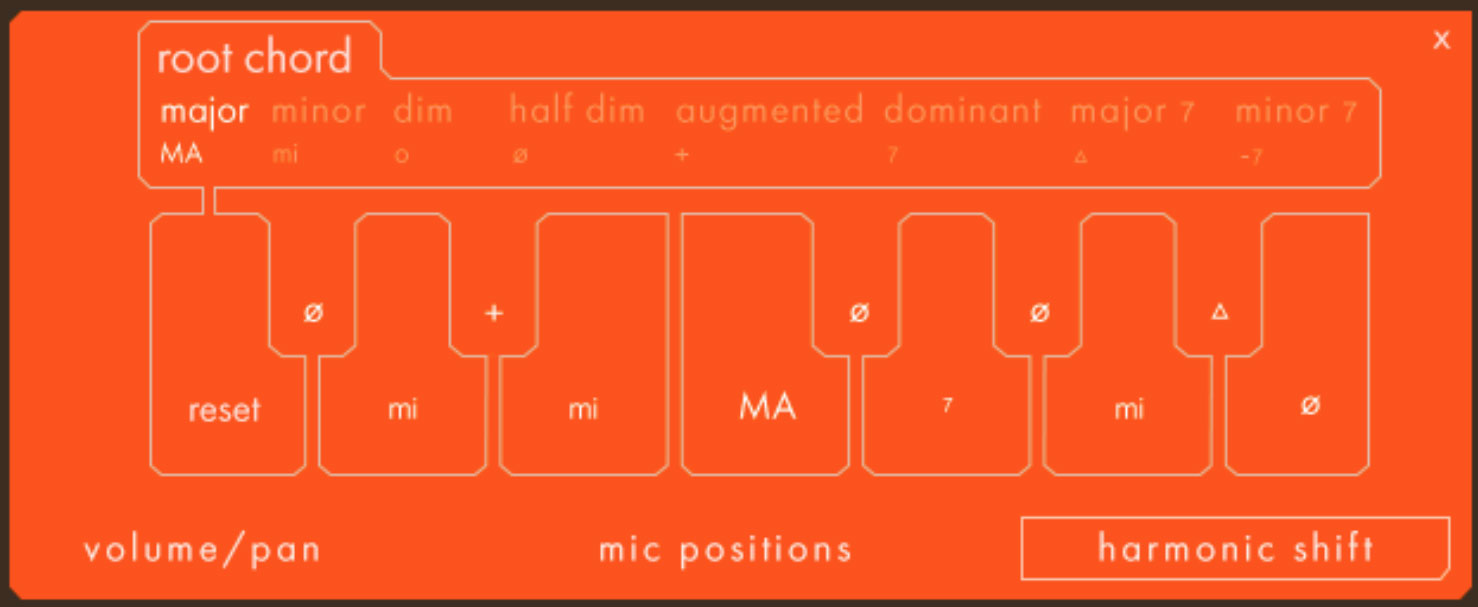
Here you can select which type of chords are played for each of the different harmonic shift keys and for each root chord. Simply click which type of root chord you want to change (major / minor / dominant etc) Then click the notes of the orange virtual keyboard where you can choose the type of chord that the particular interval will change the chord to.
We’ve included the ability to change the harmonic shift chords for the most common types of root chords: major, minor, diminished, half diminished, augmented, dominant, major 7th and minor 7th.
For suspended chords the harmonic shift keys simply transpose up the scale.
For minorMajor7th chords the harmonic shift keys cannot be changed and are set as follows:
| root | majmin |
| bII | dominant |
| II | dim |
| bIII | augmented |
| III | dominant |
| IV | half_dim |
| bV | sus4 |
| V | dominant |
| bVI | dim |
| VI | half_dim |
| bVII | dominant |
| VII | dim |
Record & Drag MIDI
An update to all Ostinato products now comes with extended functionality and it’s possible to copy and paste MIDI information from the Ostinato engine to a DAW of your choice, to be used with your own virtual instruments
Firstly, ensure that you’ve updated your Ostinato library to the most recent versions via the Sonokinetic Manager and then you’ll see a new button towards the top left of the interface with the legend RECORD MIDI. Click this button and the engine will arm, listening for incoming MIDI once your DAW starts playing.
Press your DAW’s play button and let the MIDI part play through to the end. Once you’ve hit stop in your DAW you’ll see another button pop up named DRAG MIDI. Then all you need to do is click and drag from that button into your DAW and you’ll see the MIDI copy and pasted.
Multiple tracks will be created, one for each of the ostinato note parts. You can then combine and edit this MIDI however you want to. It’s not only rhythms and chords that can be dragged over. The Ostinato engine also recognises voicings, bass invert, harmonic shift, mute and unmute, time changes and even MOD wheel information which translates to note velocity.
Playing Ostinato Brass
The basic method of playing Ostinato Brass is to play three or four note chord combinations in the key range C1 to G#2.
The chord recognition system will automatically detect inversions. The chord voicing that the engine depends on a number of factors, but is initially dictated by the voicing that you choose to play. However, this voicing can be changed using options within the interface / keyswitches.
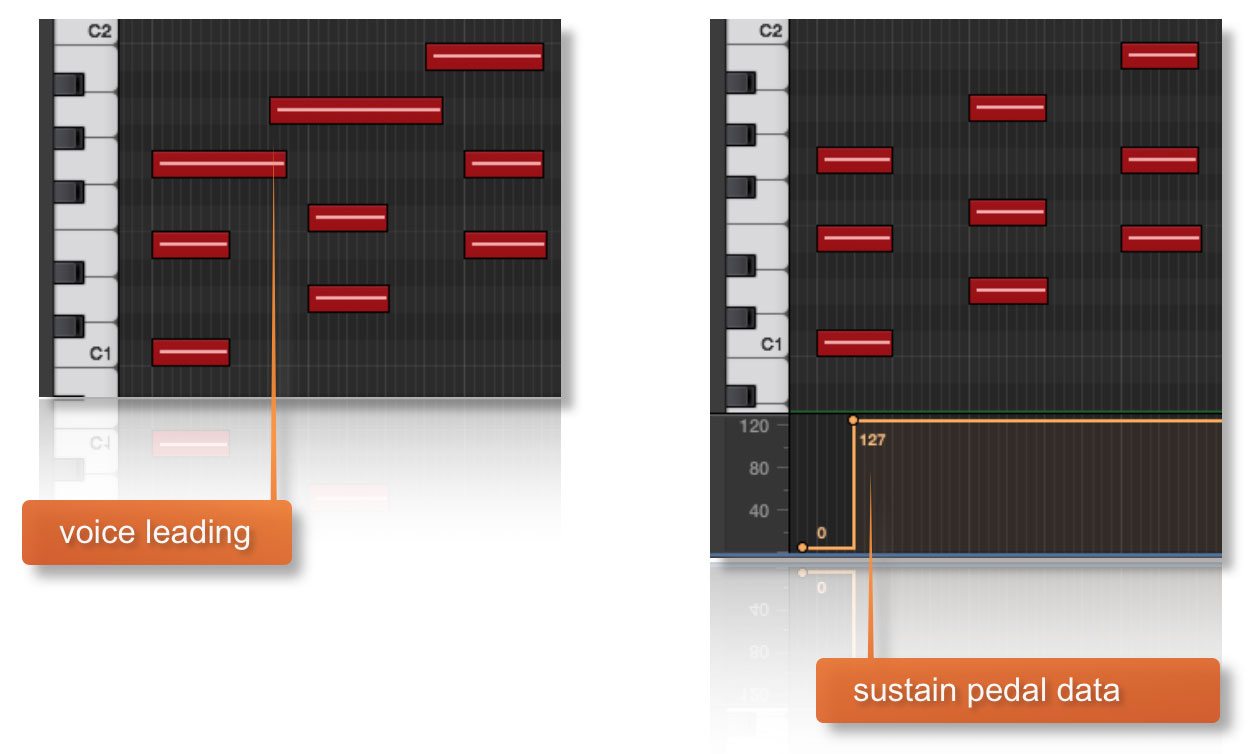
Once you’ve played a chord it’s possible to sustain it by holding just one of the notes (voice leading). This enables easy switching to new chords without any gap in the playback. Chords can also be held by using a sustain pedal. Alternatively, a chord can be sustained by holding any key down in the playable area, thus allowing changes between chords. Be aware that if your new note creates a different type of chord which is recognised by the engine then this chord will be played immediately.
Recognised Chords
The Ostinato engine recognises many different types of chords, not just standard major and minor triads. Shown below are the recognised types of chords, and their inversions. These are shown in C but of course you can transpose these to whichever root key you’d like to. Note that we had to work a little bit with the sus2 chord since a regular inversion of that would clash with the input of a sus4 chord. Also note that 7th chords can be triggered by three note voicings or four note voicings.
| major | (CEG ECG GCE) | |
| minor | (CEbG EbGC GCEb) | |
| diminished | (CEbGb – for inversions use the force inversion keyswitch) | |
| half dim | (CGbBb GbBbC BbCGb) | (CEbGbBb EbGbBbC GbBbCEb BbCEbGb) |
| dominant 7th | (CEBb EBbC BbCE) | (CEGBb EGBbC GBbCE BbCEG) |
| major 7th | (CEB EBC BCE) | (CEGB EGBC GBCE BCEG) |
| minor 7th | (CEbBb EbBbC BbCEb) | (CEbGBb EbGBbC GBbCEb BbCEbG) |
| augmented | (CEG# – for inversions use the force inversion keyswitch) | |
| minorMajor 7th | (CEbB EbBC BCEb) | (CEbGB EbGBC GBCEb BCEbG) |
| sus2 | (CDE DEC ECD) | |
| sus4 | (CFG FGC GCF) | |
| 7sus4 | (CFGBb FGBbC GBbCF BbCFG) | |
Chord Inversions
Ostinato Brass has the ability to output inversions. When playing chords in the left hand area the engine will recognise the inversion you play, and display it in the Inversion display area. When playing in the Harmonic shift area the inversion the instrument picks will be based on the relation of the chord to the last played chord and its inversion, choosing the inversion that will have the smoothest transition.
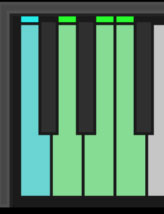
The current inversion will be shown in the interface in the inversion area next to the recognised chord in the bottom left, and by the blue key in the Inversion area of the virtual keyboard in Kontakt.
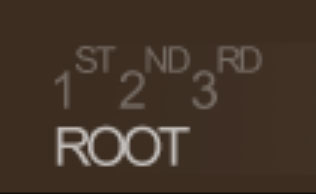
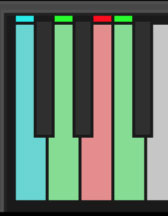
If you want to force the instrument to use a specific inversion you can use the ‘Force Inversion’ Keyswitches, which are located on the left hand side of the keyboard. These function is a one-time deal, meaning they will only influence the very next chord that is being played. You ‘arm’ an inversion by pressing one of the four keyswitches (C – root, D – 1st inv, E – 2nd inv and F – 3rd inv).
The key will turn red, and stay red until a new chord is recognised and forced to the inversion you set it to. Note that the 3rd inversion is only available for 7th chords, if you try putting a triad to the 3rd inversion it will default to the 1st inversion.
Chord Voicings
5 different chord voicings are available, either by clicking within the interface or by using the black keyswitches from C#4 to A#4. These voicings are roughly the following (examples low to high note):
- close voicing, usually a root and third notes, for examples CC CE
- close three note full chord, for instance CC CEG
- wide open three note voicing, like CC CGE
- wide closed four note voicing, for instance CC ECG
- extended chords, often no root in the top chord, for example CC EGAD
You can switch between these voicings on the fly using the keyswitches.
Single note patterns
Due to the way that Ostinato Brass was recorded, it’s possible to play just single note patterns using variation 1 and the mute controls of the two high patterns. Using this method and multiple instances of Ostinato Brass you can coax almost any chord from the samples.
Harmonic Shift in Detail
Harmonic shift is a function we have introduced in our other phrase based libraries to make it possible to shift part of your instrument to a different key, making it possible to create extended chords. For Ostinato Brass we have completely rethought what harmonic shift does. In Ostinato Brass, Harmonic Shift always works for all the phrases, so it is more like a one finger instant harmonising and voice leading tool.
Unlike in our other Instruments (apart from Ostinato Strings), you can play the Harmonic shift area standalone in Ostinato Brass, in which case it will remember the last played chord in the chord area as Root Key and makes all the Harmonic shift chord types relative to that.
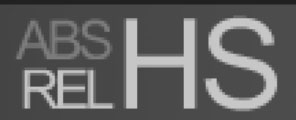
Also in Ostinato Brass we’ve added an additional mode for Harmonic Shift, you can now choose between Absolute and Relative by clicking the ABS or REL button in the bottom right corner of the interface.
Harmonic Shift can seem a bit daunting at first glance, and we think giving the option to do either Relative or Absolute should provide each type of composer with a way that works for them. For composers that work in a more functional approach (I IV bVI V etc) the relative mode will probably be the preferred method, and for composers who think more along the line of absolute chords (E A Chalf-dim B7 etc) the Absolute way would be better suited.
The easiest way to explain these methods and their difference is by giving some practical examples:
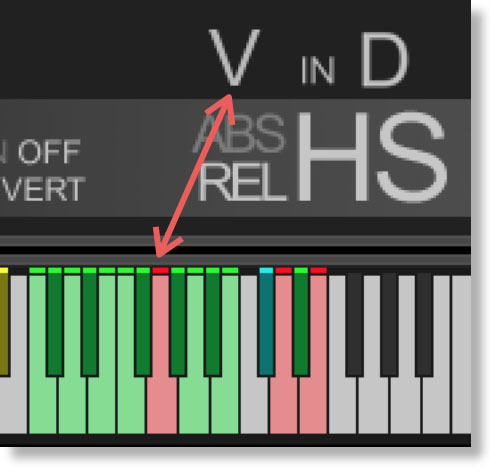
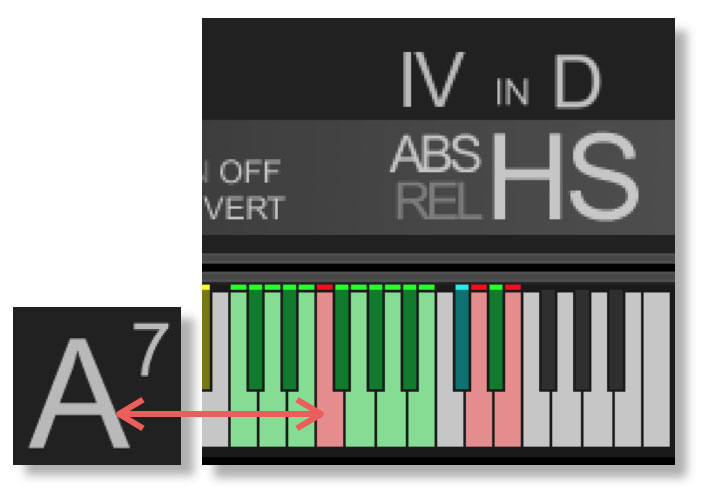
Let’s say your last played chord in the blue keys chord area is D, this will be displayed just above the HS part of the interface. If you haven’t played the HS area yet it will say ‘I in D’, ‘I’ being the function of the chord and since you haven’t played anything yet that is just the root.
Now in Relative Mode, the Harmonic shift area affects the part left of the ‘in’ directly, so if you go up the scale chromatically in the Harmonic shift area of the keyboard (the green keys between C5 and D5), that will directly correlate with the function part; C# plays the bII chord (Ebhalf-dim), D plays the II chord (Em), G plays the V chord (A7) etc
In Absolute Mode the notes you play in the Harmonic Shift area directly correlate with the root of the chord being triggered, which means if you play a C# it will play a C# chord, if you play a G it will play a G chord etc.
What type of chord will be triggered in either mode is dictated by the settings for the current root key (the chord on the right) in the harmonic shift options screen. We have set presets that should make chords conform to most keys, but if you want to change any of the behaviour you’re more than welcome to do that.
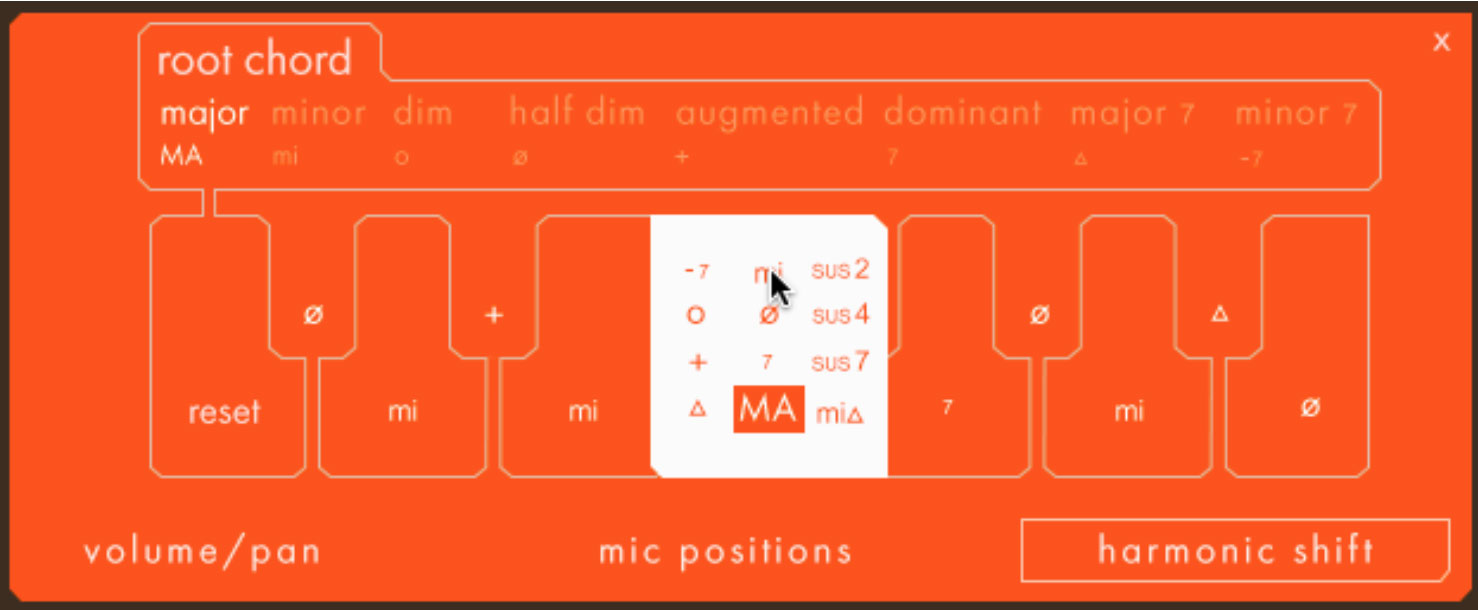
The chord type selected for editing is displayed in the top bar. In this example you will set the chord types that will be triggered for the different related chords to a major base chord. If for example your last played root chord is D major and the HS area is triggering a G chord (either by a G being pressed in Absolute mode or an F being pressed in Relative mode) that G chord will be Major by default because the IV interval in major is set to MA.
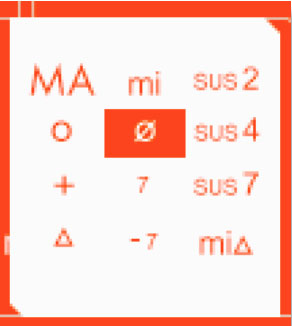
If you want a minor chord on that interval you can do that by clicking on the ‘MA’, and in the popup that appears choose ‘mi’. If a fourth interval is being triggered in any Major root chord the resulting chord will be a minor chord now.
You can reset to default by using the reset key and you can set custom behaviour for eight different root chord types. Sus chords will automatically default to playing sus chords across all intervals, you cannot change those.
Phrase Continue / Retrigger
When playing different chords or applying different Harmonic Shift intervals, you have the choice whether to retrigger the phrases or to simply continue the phrase but in the new key. This function is controlled by velocity sensitive keyswitch D6. High velocity (>84) will turn phrase continue on, low velocity (<83) will turn it off.
Bar Sync
Another feature in Ostinato Brass is the ‘Bar Sync’ option. This is controlled by velocity sensitive keyswitch E6. High velocity (>84) will turn it on, low velocity (<83) will turn it off.
This feature works in conjunction with the ‘Phrase Continue’ function. When switched on, the scripting within the Ostinato engine will read the position of the bar in your host DAW and retain playback of the phrases in line with that bar. For example, if Bar Sync is turned on and you trigger a phrase on the second beat of a bar, the sample will play from its second beat too.
- Note that Bar Sync can only be used in Phrase Continue mode. If Phrase Retrigger is engaged instead, Bar Sync will automatically switch off.
- When Phrase Continue mode is switched on again, Bar Sync will return to whichever setting was being used previously, either on or off.
Sequencing Ostinato Brass
There are a number of different ways to play Ostinato Brass and change chords. You can either use the sustain pedal to hold chords, use voice leading on one or more notes or simply release and retrigger. These different modes become important when it comes to using Ostinato Brass in your chosen DAW.
Whether you play Ostinato Brass ‘live’ into your DAW and edit the MIDI afterwards, or if you sequence directly using your DAW’s piano roll, there a few things you should know which will help you get the best from the instrument.
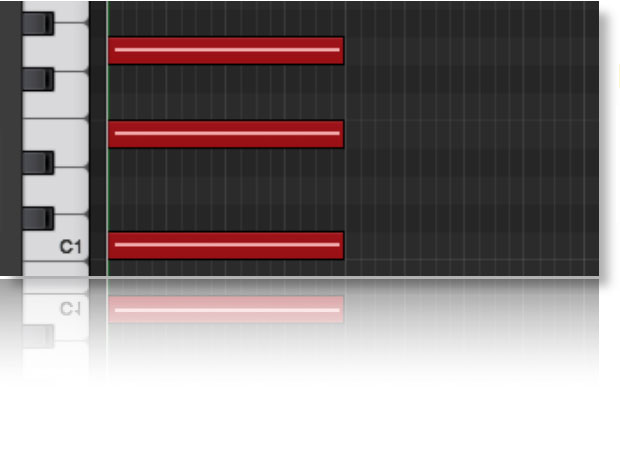
If you are just triggering one simple chord and then releasing, it is normally best to quantise the start and end of the MIDI chords. We would also advise leaving the Phase Follow and Bar Sync keyswitches set to off.
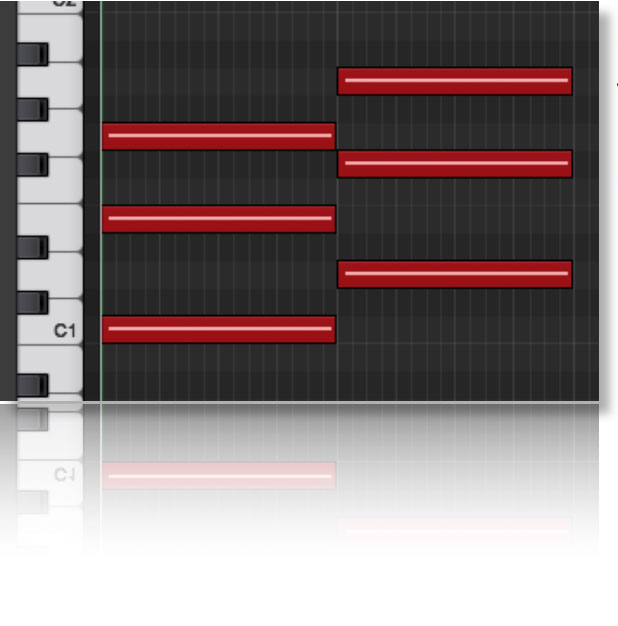
Quantised blocks of MIDI chords as shown is the simplest way to create a chord change. We do however recommend you play the instrument rather than program it, since this usually renders the best results (see below for more pointers on that)
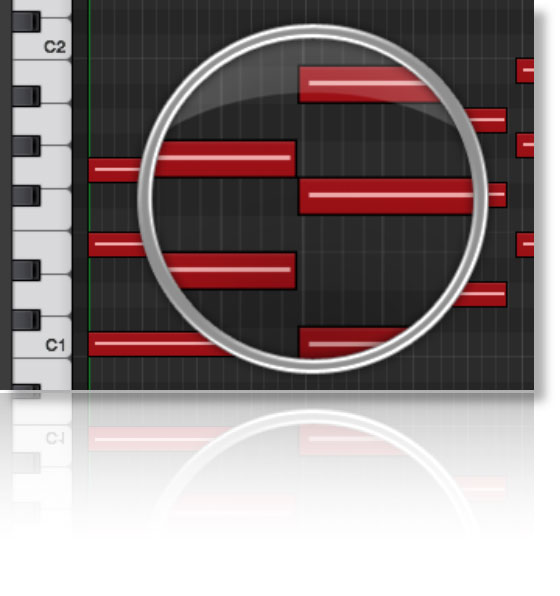
When you do program the notes, it is often best to quantise the very first chord, whilst ensuring that Phrase Follow is set to on. Subsequent chords can be triggered slightly before the beat so that the attack portions of a new chord are maintained. However, it is difficult the program blocks of chords in this manner as the end of one chord has to perfectly line up with the start of the next. This, in itself, is a challenge in most DAWs. It’s much easier to utilise the sustain pedal or voice leading…
Both voice leading and using the sustain pedal produce the same effect; a sustained chord which is held until 3 / 4 notes of a new chord are engaged. This is by far the best way to get great chord transitions with Ostinato Brass. Offset the MIDI notes of every chord except the first, slightly before the beat (in the same way as described above) to capture the new attack phase. Use the Phrase Follow so that the new chord plays the new phrase where the old one left off.
Samples
44.1kHZ – 24 Bit &
16 Bit NCW format
16BIT – 10.000+ SAMPLES
24BIT – 10.000+ SAMPLES
16BIT – 3,9GB NCW Format
24BIT – 7,3GB NCW Format
Royalty and copyright free
content license
Instrument Patches
Native Instruments Kontakt
Brass
Brass Lite
Time Machine Pro capability
Custom chord recognition and Harmonic Shift capabilities
Intelligent Purging system
Sampled Instruments
1 recorded orchestral sections
– Brass 14 players
4 recorded microphone positions
– Close
– Decca tree
– Wide
– Balcony (Far)
…and a proprietary stereo ‘Tutti’ mix for the ‘lite’ instrument
10 reviews for Sonokinetic – Ostinato Brass
| 5 star | 100% | |
| 4 star | 0% | |
| 3 star | 0% | |
| 2 star | 0% | |
| 1 star | 0% |
















The brass samples sound incredible and are easy to use – definitely worth the price!
The brass loops in this library are top-notch, adding a new level of depth to my compositions. Would definitely recommend for any composer looking to add some flair to their tracks!
Loved the powerful sound and versatility of this brass library – definitely added depth to my compositions!
I love the rich sound and easy usability, definitely worth the price.
I was blown away by the quality of the brass sounds in this sample library. Would definitely recommend to any music producer looking to add some epic brass tones to their compositions!